Fingerstyle Crash Course
August 16, 2023
Pro tip: please watch the short video version of this post that I link to here: www.guitarsuccess4u.com/fingerstyle. It will give you a much clearer grasp of what I’m sharing here.
Transcript and diagrams included below…
If you’ve always wanted to experiment with fingerstyle guitar but you didn’t know where to start, you’re in the right place.
Fingerstyle guitar spans multiple genres, and can be applied beautifully to worship music, folk music, pop music, and more.
Today, I’m going to show you my approach to a “crash course” for fingerstyle guitar.
Now, as you may know, a crash course is a quick, intense approach to learning something, so I want to keep our expectations reasonable.
The world of fingerstyle guitar is vast and beautiful, and even though we’re only going to tackle one fingerstyle pattern today, I think you’ll be able to celebrate a win with me, because it’s a good one. So, let’s embark on some important initial steps.
Let’s start by defining some quick terms. I like to use the Spanish system for memorizing my thumb and fingers. Even if we’re not playing Spanish or classical guitar, this system can totally benefit us.
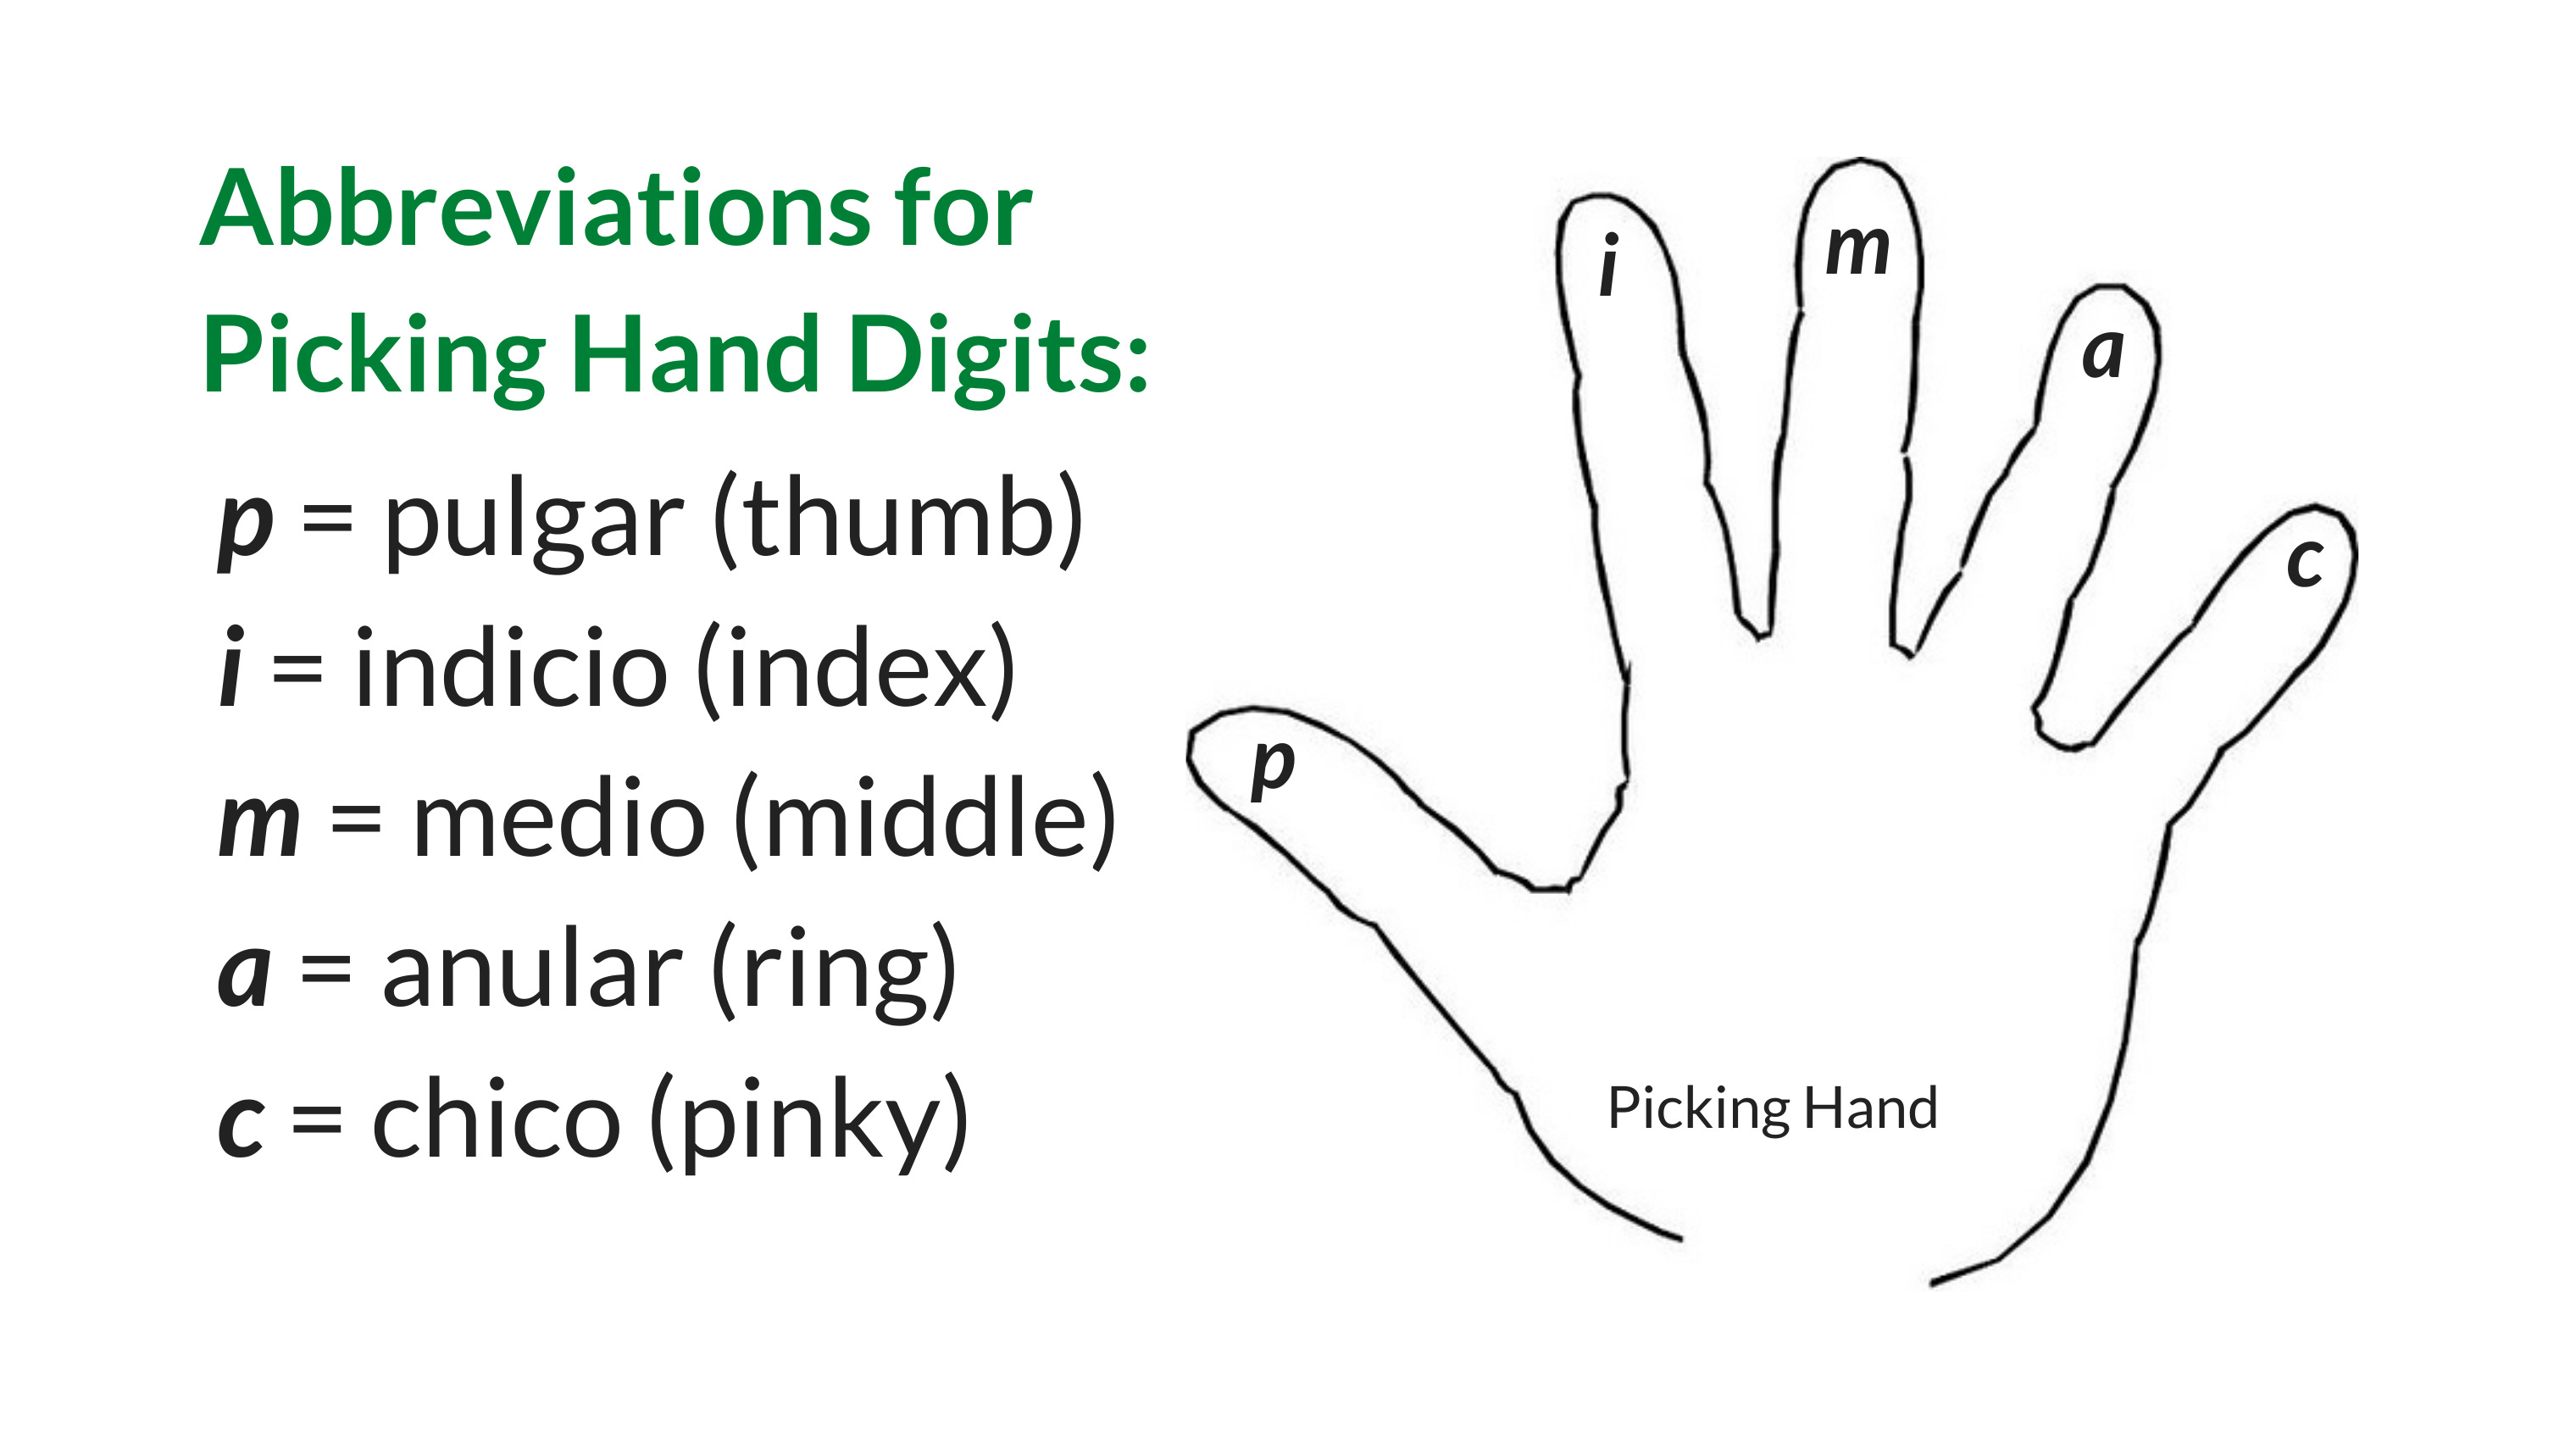
The names of our picking hand digits can be found in this diagram.
{Diagram – Abbreviations for Picking Hand Digits}
Try saying just the letter that corresponds to each. We have: p, i, m, a, and c. Try going backwards: c, a, m, i, and p.
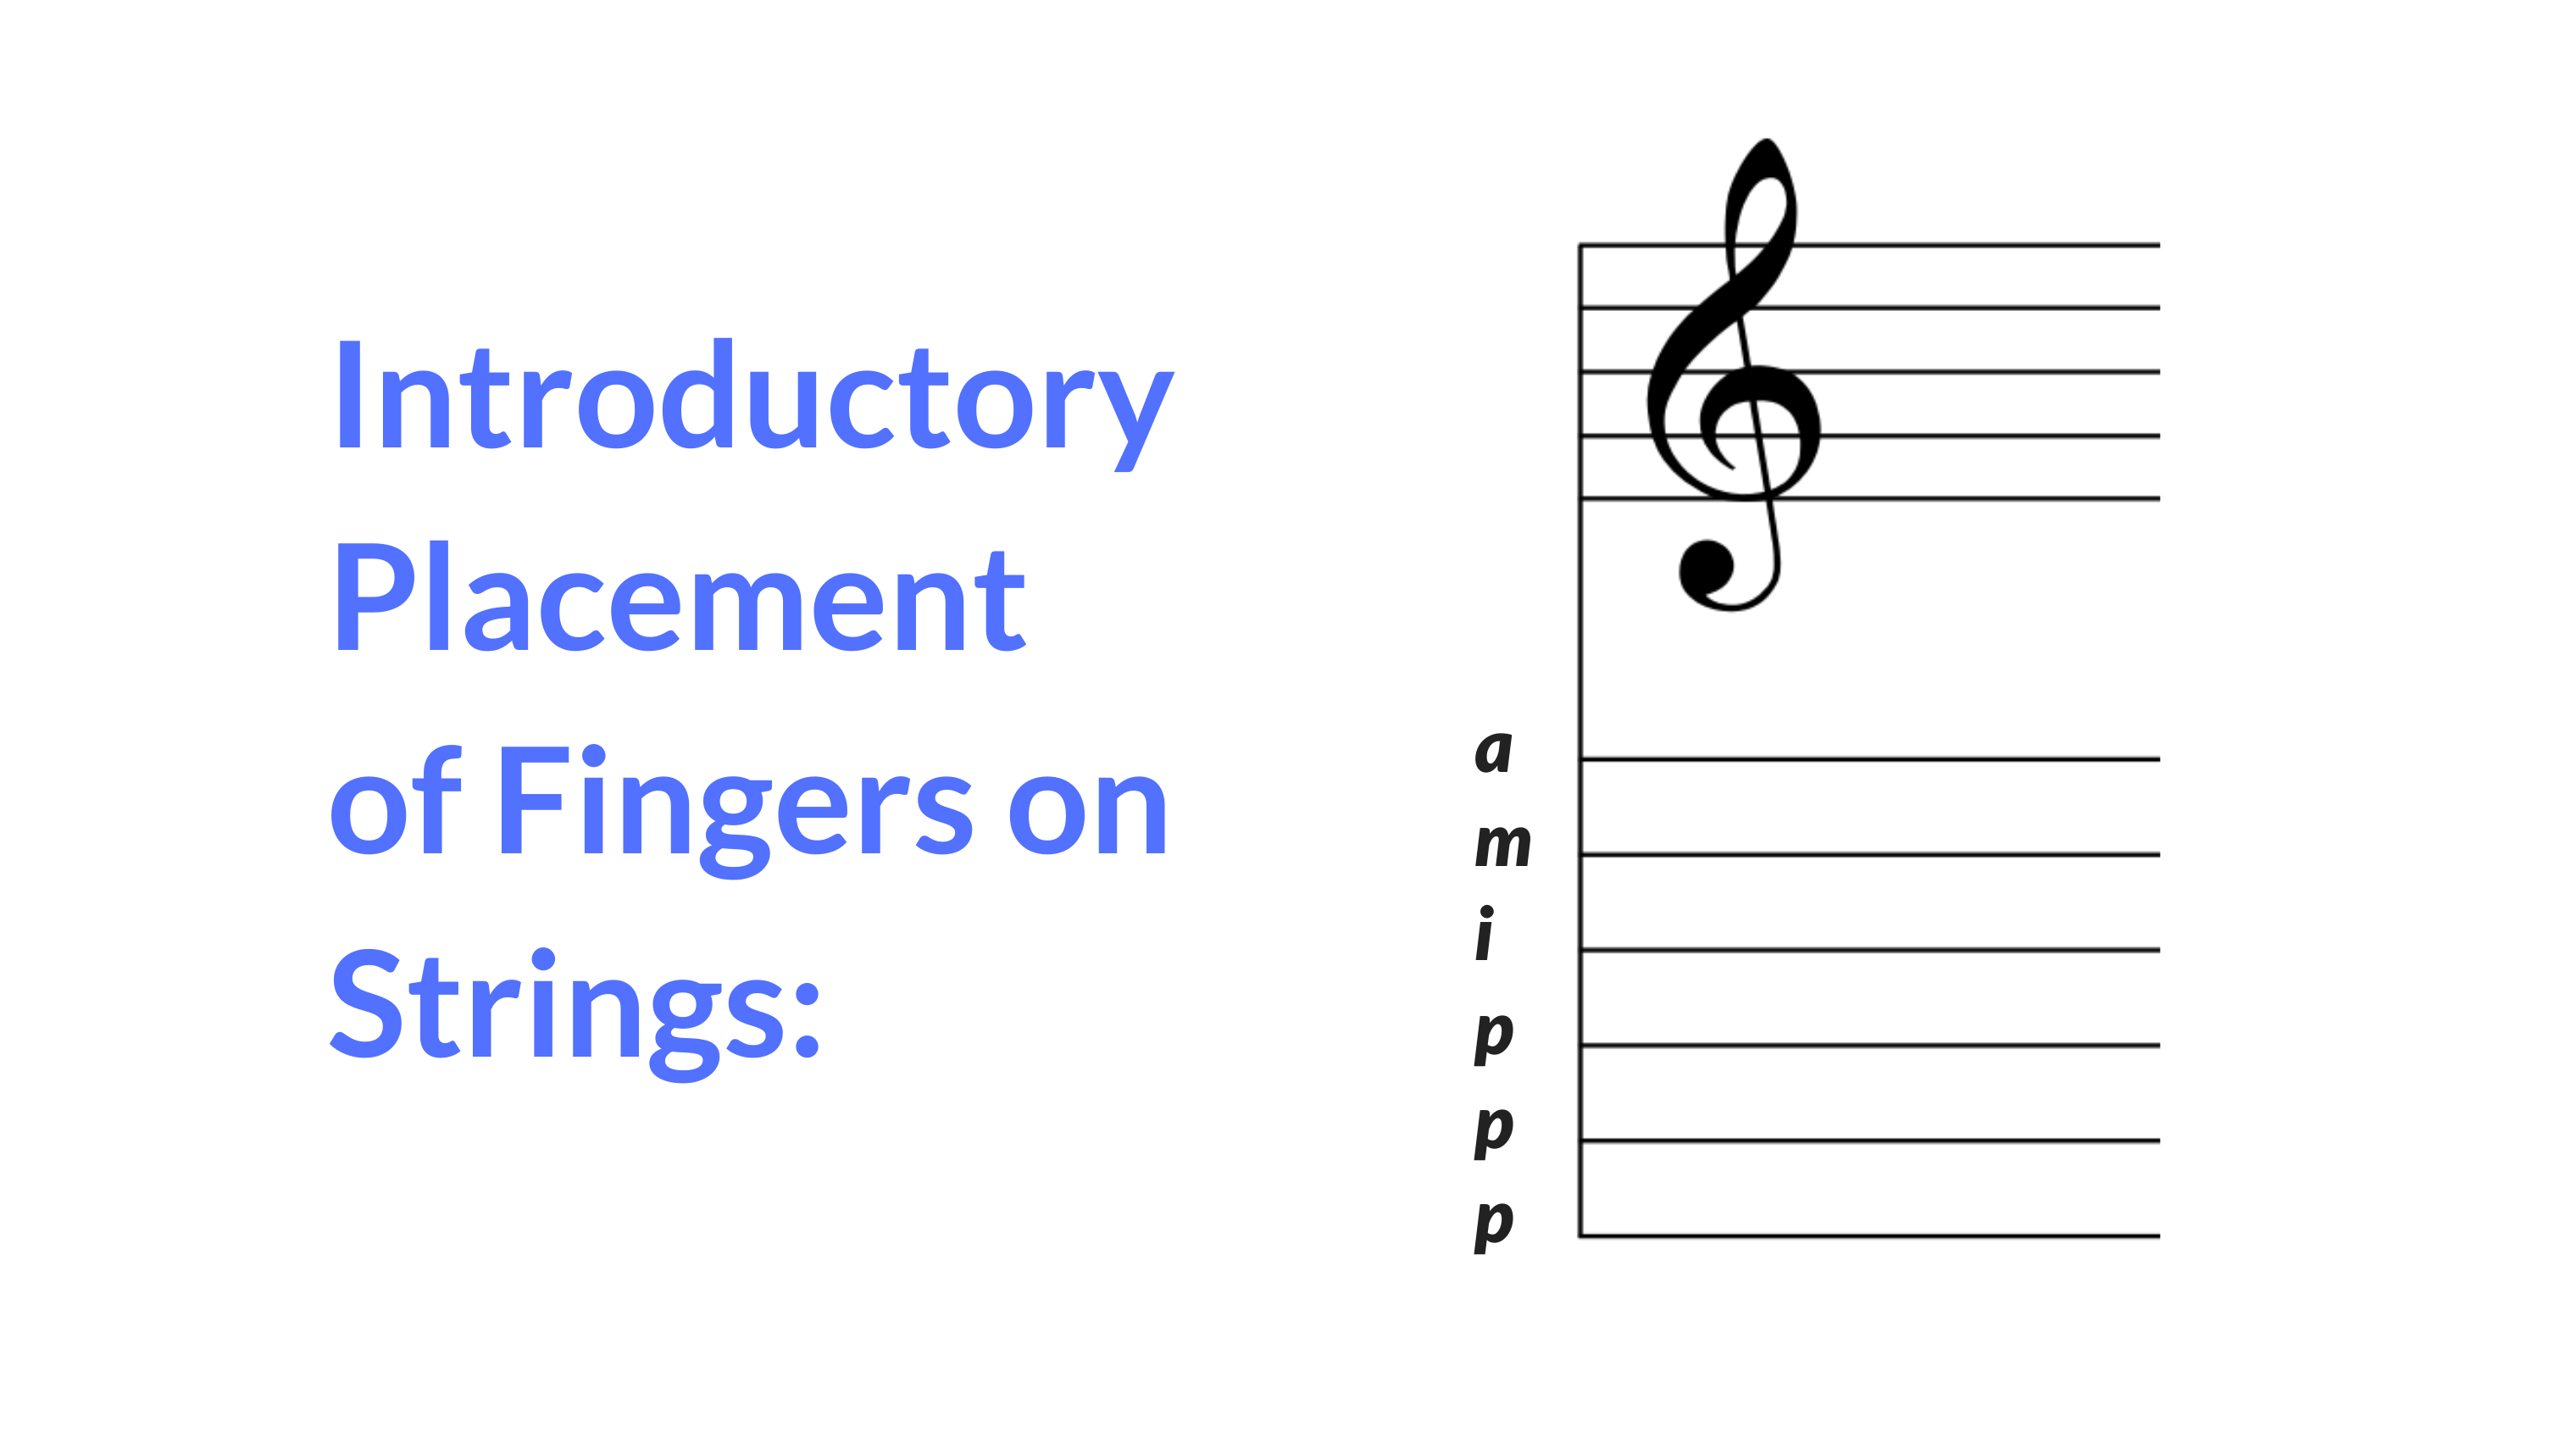
Now, let’s talk about how we place these digits on the strings.
Our pulgar, or thumb, is so strong, that we can start by allocating strings 6, 5 and 4 to it. The thumb literally owns half of the strings for beginning fingerstyle guitar. Then, the indicio or index owns string 3, the medio or middle owns string 2, and the anular or ring finger owns string 1. The chico does not get used in these early stages.
So, from low to high, the digits owning these strings are p, p, p, i, m, and a, and from high to low, they are a, m, i, p, p and p.
Let’s take what we’ve just established and apply it to a simple open chord: E minor. I’m just going to use my picking hand over and over to arpeggiate this open E minor chord. I encourage you to watch the video and to play along for this.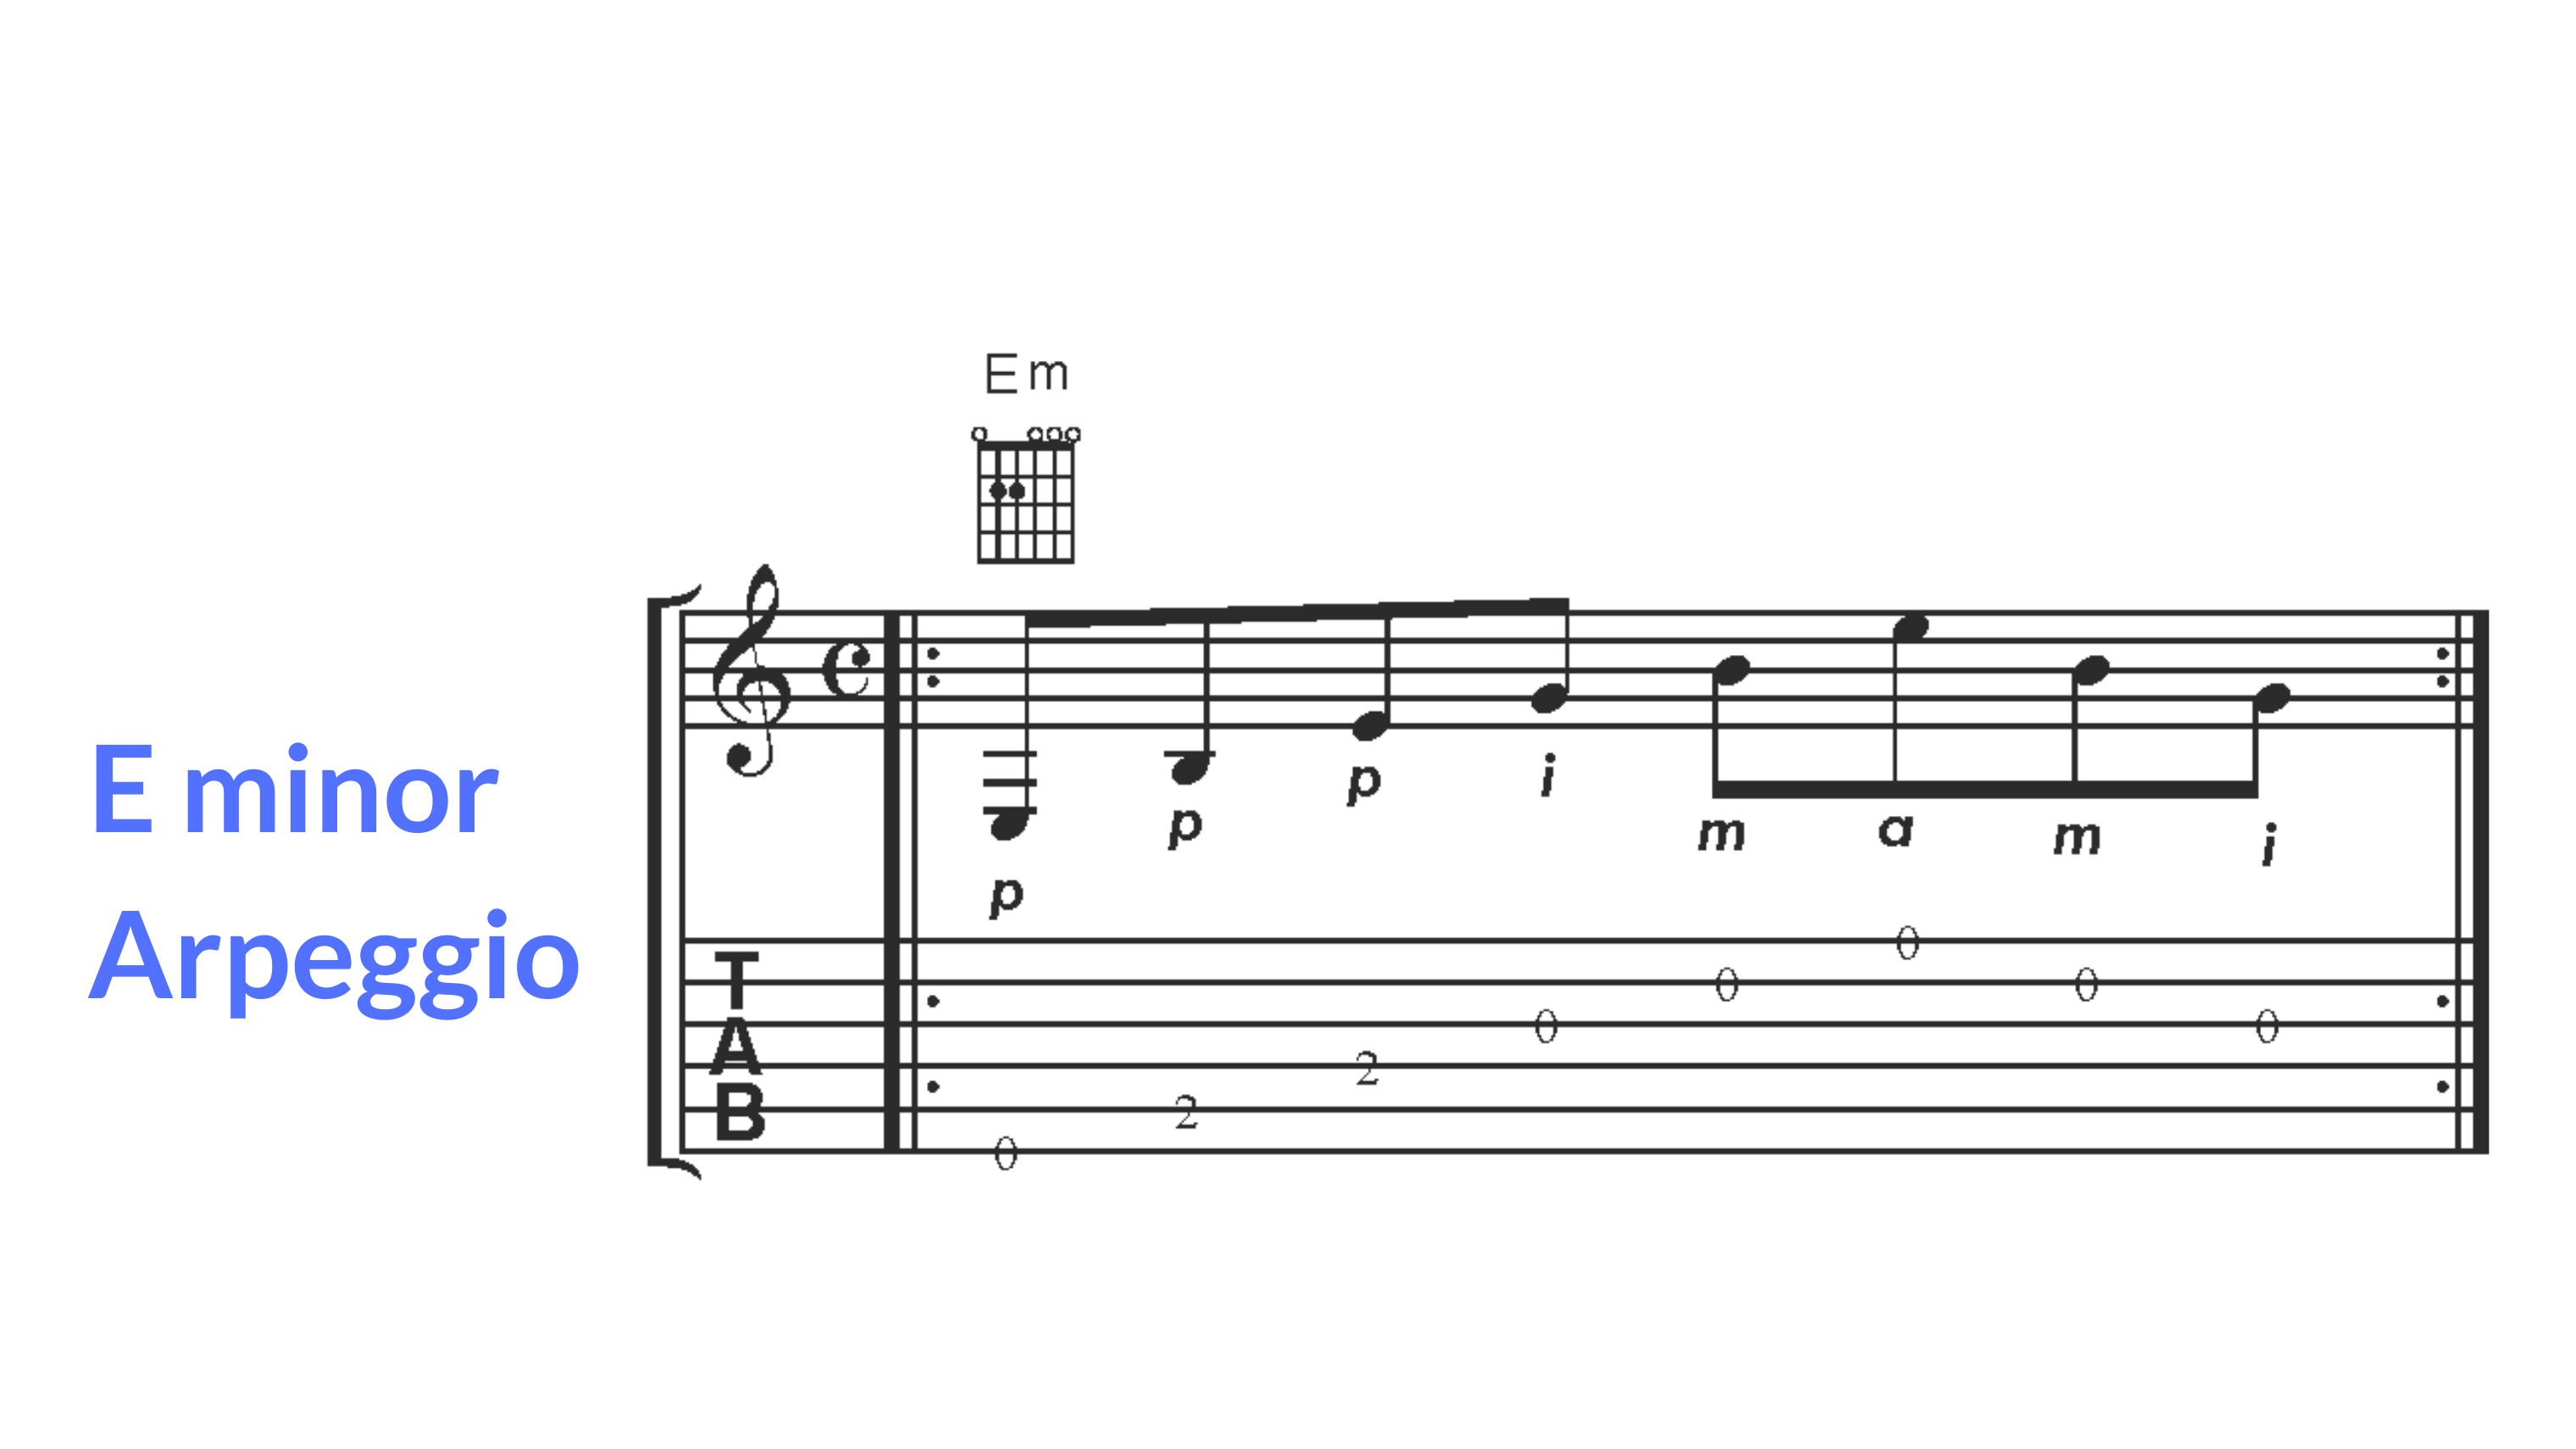
Next, I’ll form an A minor chord and play an arpeggiated figure that also repeats.
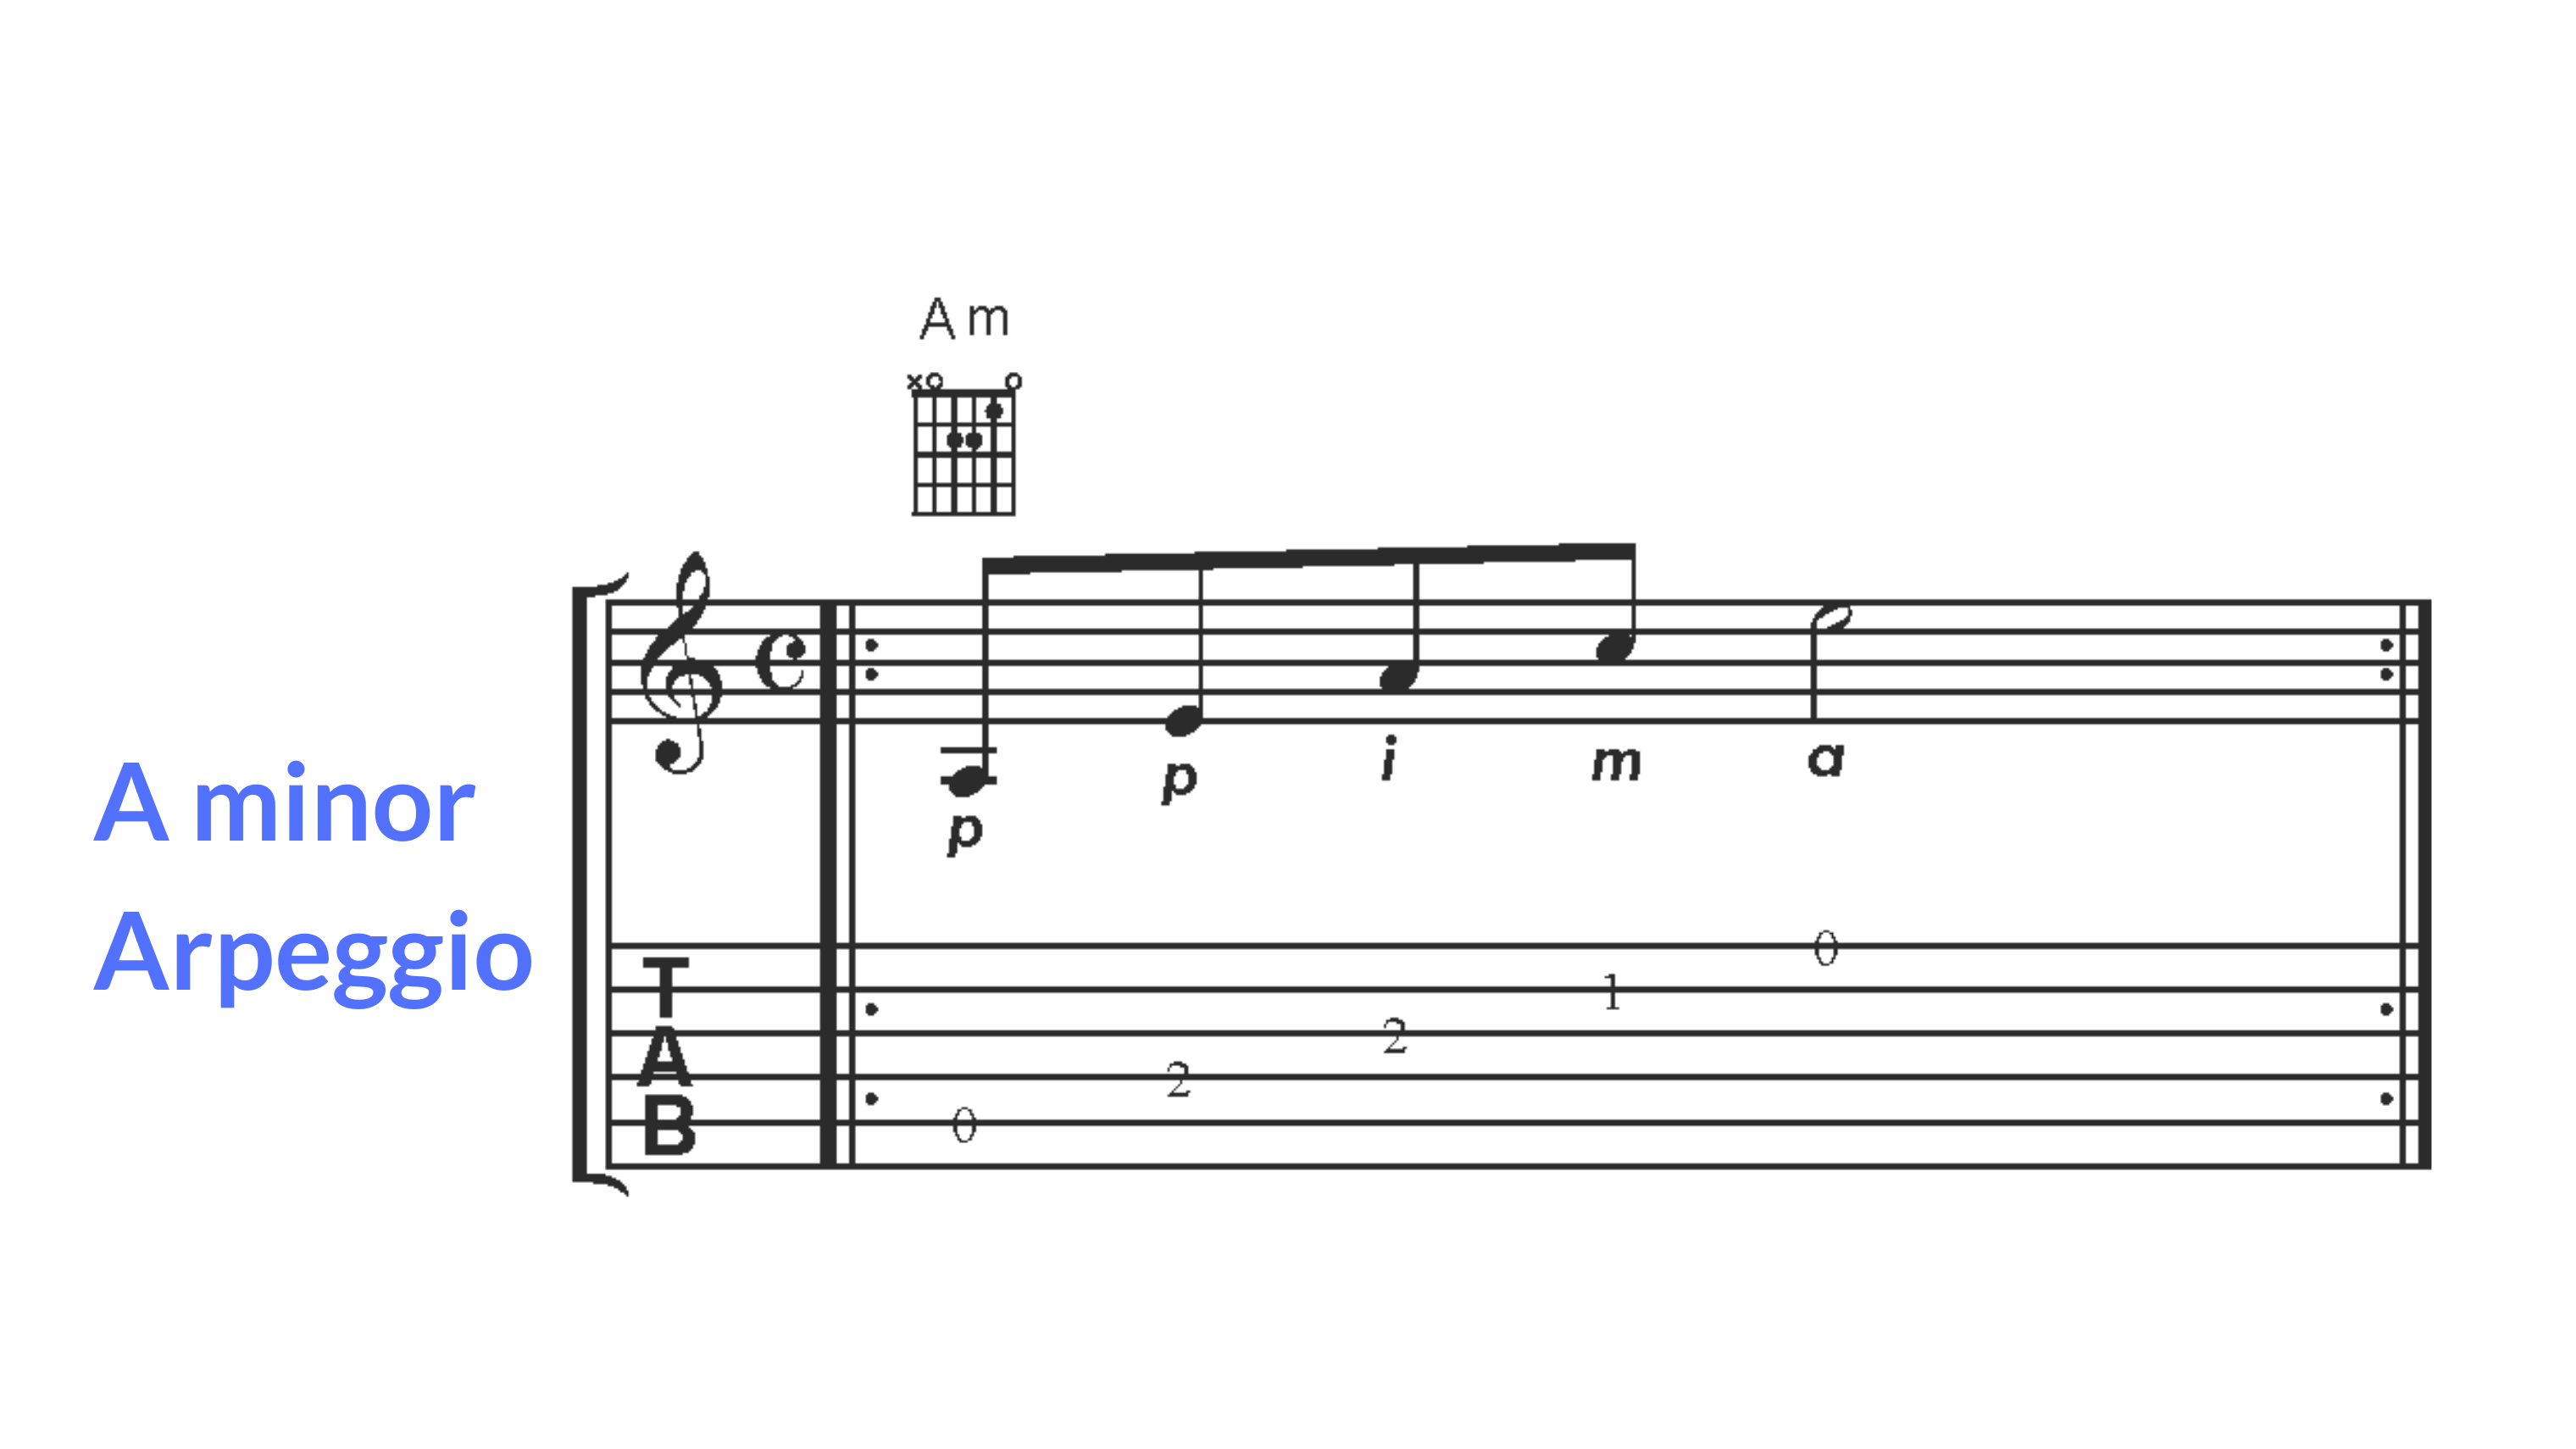
Now that we’ve established the A minor notes, I’m actually going to make this just a bit simpler. I’ll only be using the pulgar, indicio and medio – just p, i and m, for a pattern I’ll call “Sweetly Rocking.” It’s just one note shy of what’s called “Travis Picking.”

As you can see and hear, this sounds rather nice with just a single chord. But as I’m sure you’re aware, fingerstyle patterns can be applied to any chord. The video has a demonstration of me playing this same “Sweetly Rocking” pattern through several chords, some of which are color chords.
Even with a single fingerstyle pattern, there are so many possibilities!
Well, this was indeed a crash course for fingerstyle guitar, but we made some great first steps.
If you’re ready to go deeper and discover insights that I’ve distilled down from almost 30 years of guitar study and performance, as well as crossing paths with some of the most accomplished fingerstyle guitarists on the planet, please visit www.GuitarSuccess4U.com.
Hopefully this inspires you a bit with your guitar playing. Thanks for spending a little time with me today. Keep playing, and I’ll see you next time!
ABOUT ME
David Harsh
Singer, Guitarist, Teacher
Welcome to a blog designed to enhance your guitar journey as you offer your gifts to the Lord.
LISTEN TO GUITAR SERIOUS FUN WHEREVER YOU GET YOUR PODCASTS


© 2023 GuitarSuccess4U a ministry of David Harsh Ministries.